Finally, the drawing can now be saved and printed via the following steps.
Please note that saving to a CAD file format other than *.abd is not supported in the evaluation/demo version of the software.
•Select File > Save Drawing As... from the main menu. From the ensuing Save As dialog box specify and enter the following:
o (1.) Browse to your user folder ...\Documents\GLS\Albion.
o (2.) Enter a new file name: SewerNetwork_1.abd (Leave Save as type: *.abd as it is.)
o (3.) Click Save button.

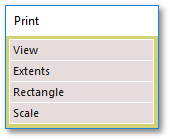
•Select File > Print > Print... from the main menu (or click on the ![]() Print icon at the top main toolbar). From the ensuing Print pop-up menu select Extents (which will ensure that the complete drawing extent will be printed):
Print icon at the top main toolbar). From the ensuing Print pop-up menu select Extents (which will ensure that the complete drawing extent will be printed):
The Hard Copy dialog box will then appear, where
o(1.) you can select from the Paper Name drop-down list the paper size, viz. A4 (210x297 mm)
o(2.) click the Write PDF button:
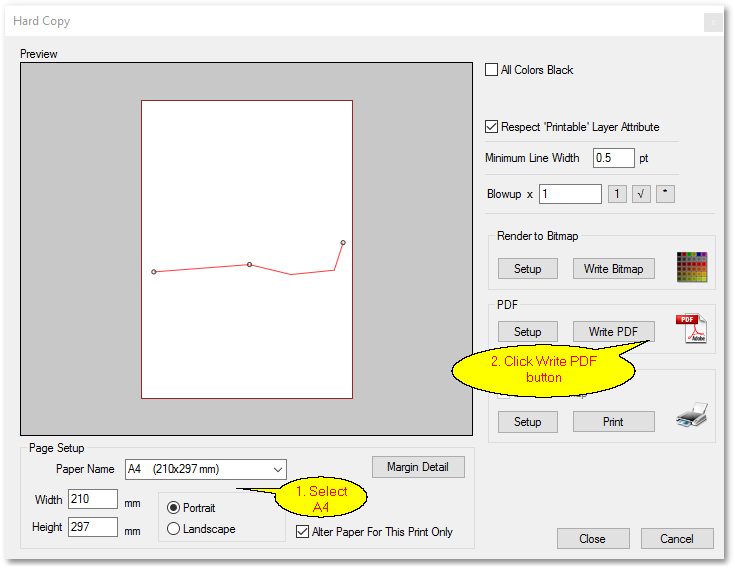
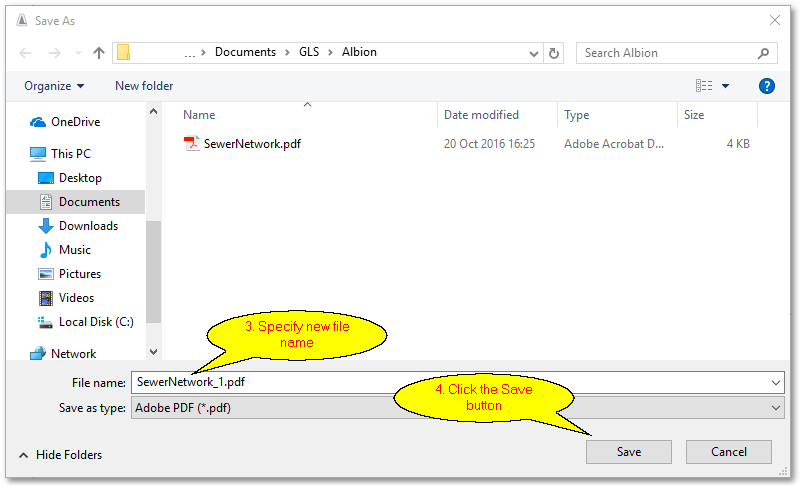
o(3.) The Save As dialog box will appear, where you must specify a file name e.g. SewerNetwork_1.pdf (note, not necessary to enter .pdf, it will be added automatically) for the new PDF file to be created.
o(4.) Click the Save button when finished, to write the PDF file.
•After successful PDF writing, the following message will appear at the bottom status screen:

This concludes Albion CAD Quick Start Guide. Many more features and functions of Albion are discussed in the detailed tutorial and the online help.
Before continuing with the next tutorial, it is recommended to exit and restart the program to start with a clean slate.