Cadastral data is often only available in CAD format. We will start this tutorial by importing shapes into Albion GIS from a CAD layer.
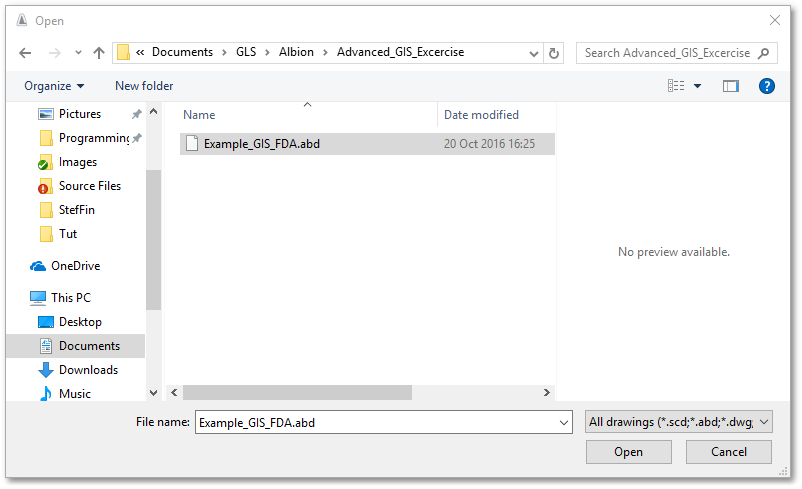
•From the main menu select File > Open Drawing (or click on the ![]() Open Drawing icon on the top main toolbar) and browse to ...\Documents\GLS\Albion\Advanced_GIS_Excercise to load in the cadastral CAD file Example_GIS_FDA.abd.
Open Drawing icon on the top main toolbar) and browse to ...\Documents\GLS\Albion\Advanced_GIS_Excercise to load in the cadastral CAD file Example_GIS_FDA.abd.
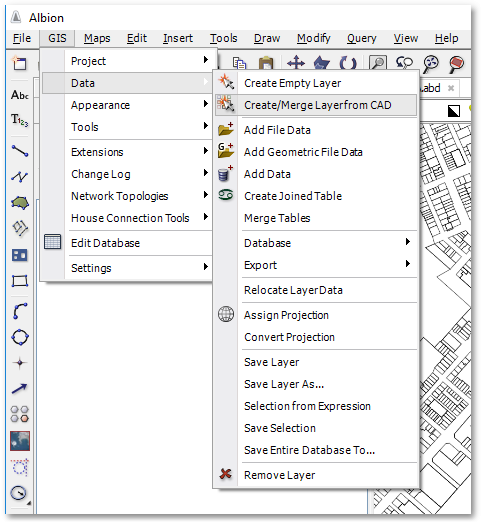
•Select from the main menu GIS > Data > Create/Merge Layer from CAD
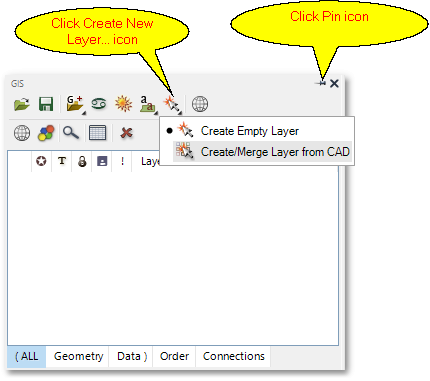
Or, open GIS fly-in menu on left (if not already open), pin it and click on the Create New Layer icon and select Create/Merge Layer from CAD:
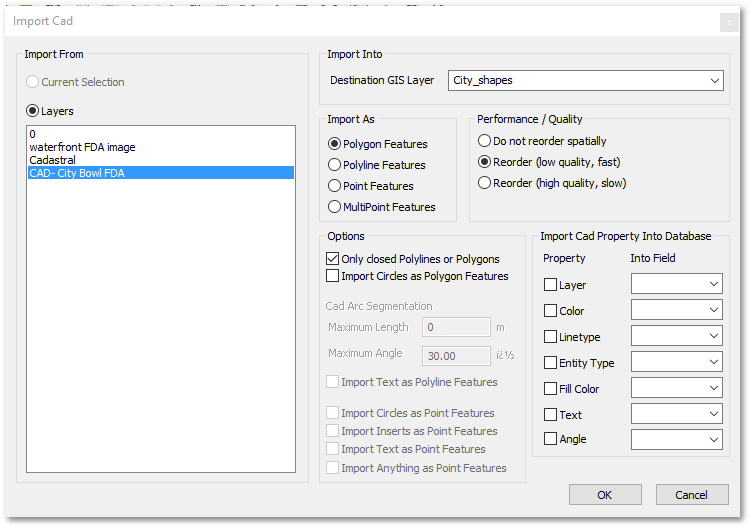
•The Import Cad box will open where we can specify the following settings to create a GIS layer from the CAD- City Bowl FDA layer:
o Select correct layer to import from, viz. CAD- City Bowl FDA layer.
o Enter a name for the new GIS layer you are creating, viz. City_shapes.
o Settings Import As: Polygon Features.
o Options: Only closed Polylines or Polygons
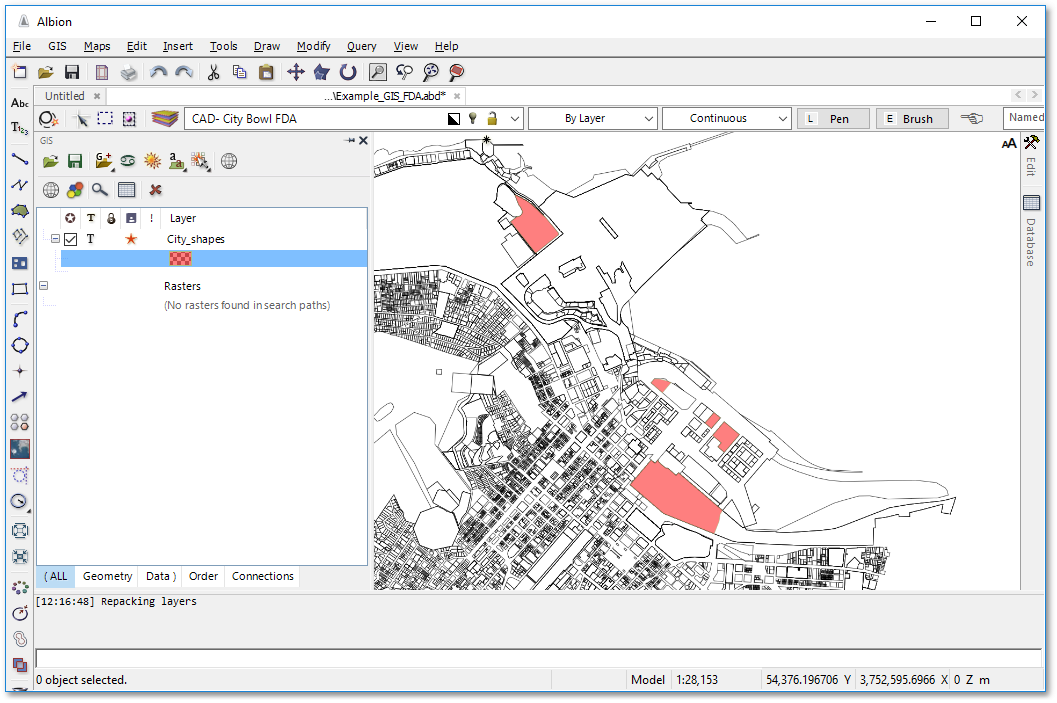
A new (unsaved) GIS layer with entities is created with the name entered, viz. City_shapes.
•You can temporarily set the CAD- City Bowl FDA and waterfront FDA layers visibility off (via the Layer Control box), to see only the newly created GIS polygons on the City_shapes layer (there should be five of them).
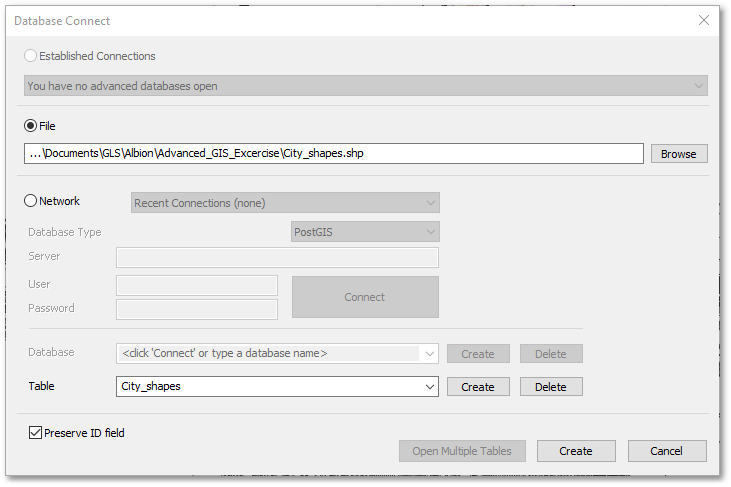
•You can now save the imported polygons to a shapefile. Click on the red star in the GIS layer manager to open the Database Connect box then click the Browse button to browse to your user folder and specify a file name for the new GIS layer, viz. City_shapes.shp
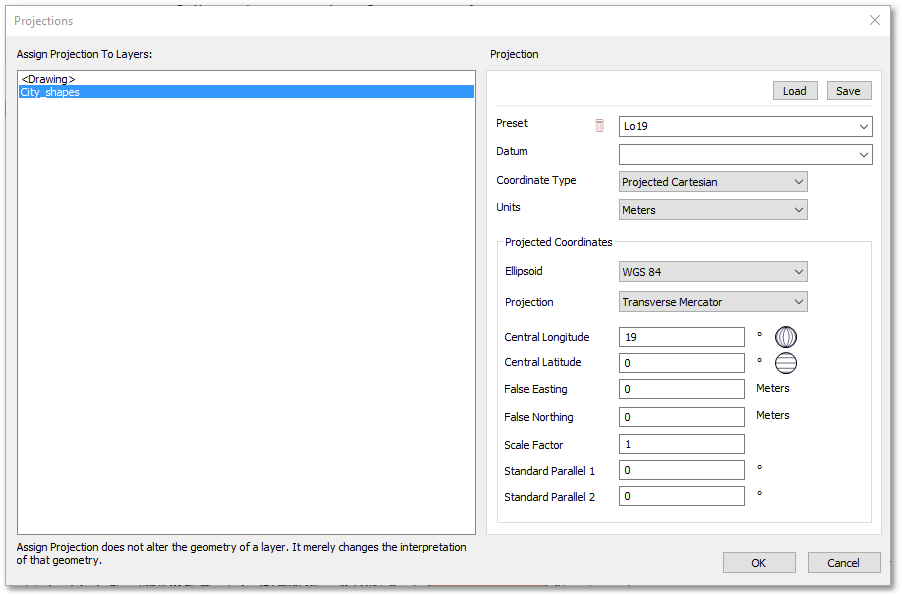
•Finally you can check the projection of the City_shapes shapefile by slecting GIS > Data > Assign Projection form the main menu, or click on the Assign Projection icon in the GIS layer manager. The Projections box will open where you can view (and edit) the projections of all layers in your project. The projection parameters as shown below for the City_shapes shapefile, are typical of that used for the Cape Town area. You can also inspect the Example_GIS_FDA.abd i.e. <drawing> layer projection parameters as listed in the Projection box - you will notice they are the same. When you create a new shapefile in Albion, it will automatically inherit the projection parameters from the background drawing, provided there is stored projection data available in the drawing (your tutorial file Example_GIS_FDA.abd has projection data stored in it). Also note than when you save a shapefile in Albion, as carried out in this tutorial, it will automatically save the associated projection data in a .prj file (you can inspect the City_shapes.prj file, located in your training folder).