We will end off this tutorial by saving the project and then printing all Layouts to one PDF file.
•Save your drawing with a new name (by selecting File > Save Drawing As... from the main menu which will open the Save As dialog box. Enter a filename ending in .abd).
•Save your GIS project with a new name (Please note that saving of GIS projects is not supported in the evaluation/demo version of the software):
o by selecting GIS > Project > Save Project As... from the main menu;
o which will open the Save Project dialog box, tick the Save GIS Project File tick box (save CAD Drawing can be left unticked, since it is already saved - see above, first bullet);
o click OK which will open a dialog box for entering and saving a new GIS project file name.
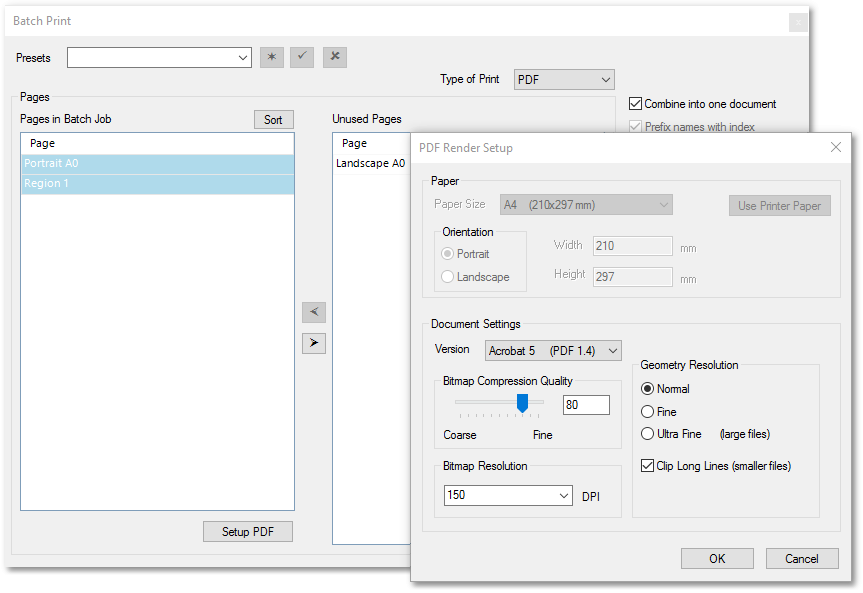
•Finally to print all your Paper Space pages into one PDF document, go to File > Print > Batch Print
•Move from the Unused Page to the Pages in Batch Job, by selecting and clicking the left arrow. Leave the two template Layouts under the Unused Pages.
•Make sure the top right, Combine into one document tick mark is on.
•Select from Type of Print list: PDF
•Optionally select all pages in the left dialog, then click on Setup Print, to change PDF quality settings.
•After pressing OK, you will be prompted for the PDF file name.
•A hyperlink will appear at the bottom status panel, which will open the PDF provided you have a PDF viewer installed on your computer.
•Click on this link, and confirm the output is as desired.
This concludes the tutorial on Paper Space Printing from GIS.
Before continuing with more tutorials, it is recommended to exit and restart the program to start with a clean slate.