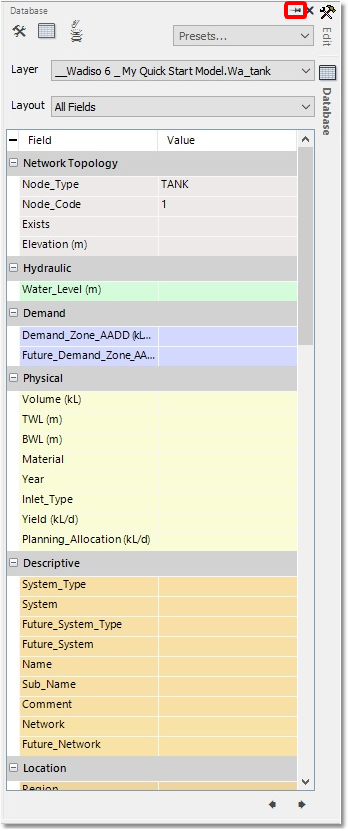
We will now specify a level for the tank we just created at Node 1. Click on the rectangular Tank 1 icon, and hover over the ![]() Database icon on the right-hand side:
Database icon on the right-hand side:

A new panel will open onto the screen (viz. the Database panel editor), revealing the GIS database-entry for the current item selected on-screen or in CAD. Here, you will find all the information about the current item. In order to pin this panel to the interface (i.e. keep it permanently open, if you have a wide screen), click on the ![]() Pin to prevent auto hiding icon, as shown below:
Pin to prevent auto hiding icon, as shown below:

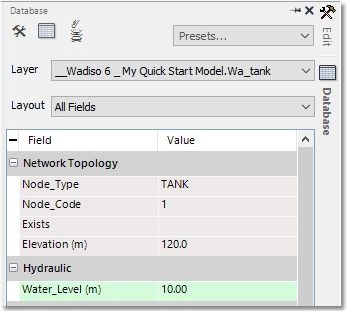
Once the Database editor is open and Tank 1 is selected, click on the empty field to the right of the field labelled Water_Level (m), found under the Hydraulic grouping. Enter a value of 10, and press Enter/Return. This input corresponds to a water level of 10 m for Tank 1.
We also want to add a ground elevation to the current node, in this case Tank 1. For this, we will need to enter a value for the field labelled Elevation (m), found under the Network Topology grouping. Enter a value of 120, and press Enter/Return. This input corresponds to a ground elevation of 120 m.
All input is shown below:

Repeat the process of adding the Elevation (m) values for Node 2/3/4, by assigning elevations of 100, 90 and 80 m, respectively.