The layers currently appear cluttered. We will improve their appearance by specifying appropriate styles and portray certain information via colour rendering.
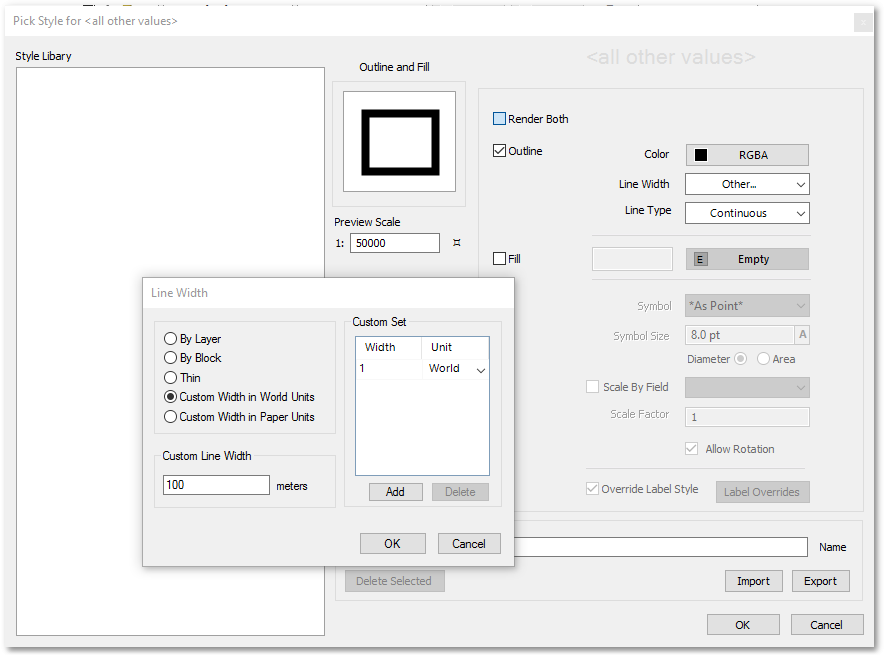
•We will display the region polygons as black frames by clicking in the GIS layer manager on the Region layer colour box. The Pick Style box will open where you can set the follow:
o Color: Black outline (via the Palette box, which will open when clicking on the RGBA button)
o Fill: No fill (uncheck the tic box)
o Line Width: Other... (Which will open the Line Width box where you can enter a Custom Line Width of 100 m in real world size, see below):
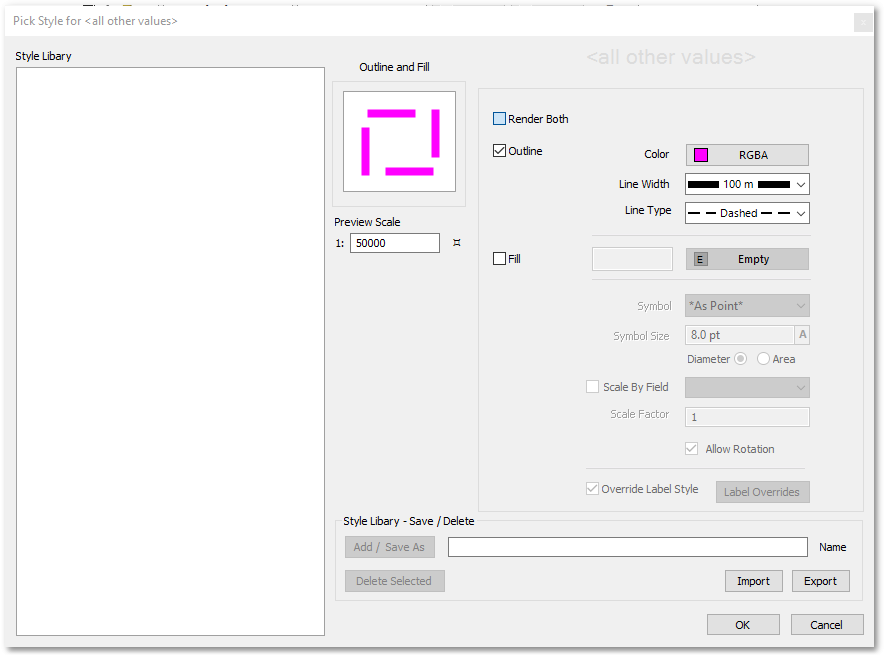
•For the Area of Interest layer we change the style accordingly:
o Color: Magenta outline
o Fill: No fill
o Line Width: a Custom Line Width of 100 m (in real world size, see below)
o Line Type: dashed line style:
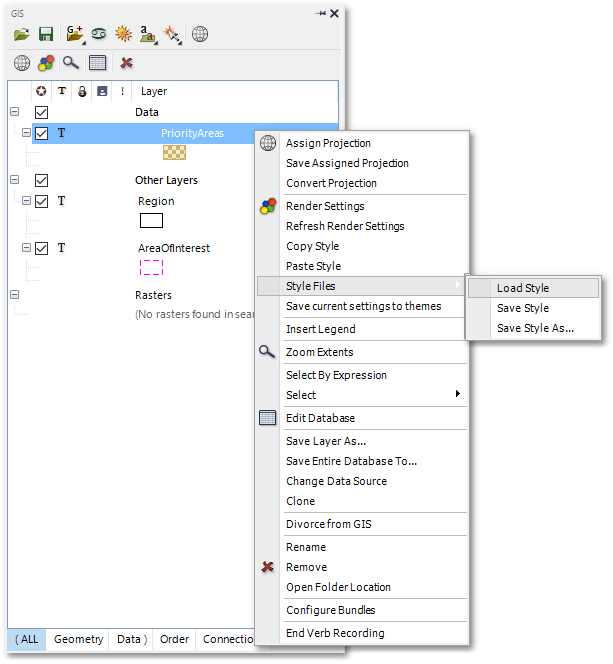
•For the Priority Areas layer we load a predefined Style, using Right-click on the layer, then Style Files > Load Style and select PriorityStyle.AbGisLayerStyle:
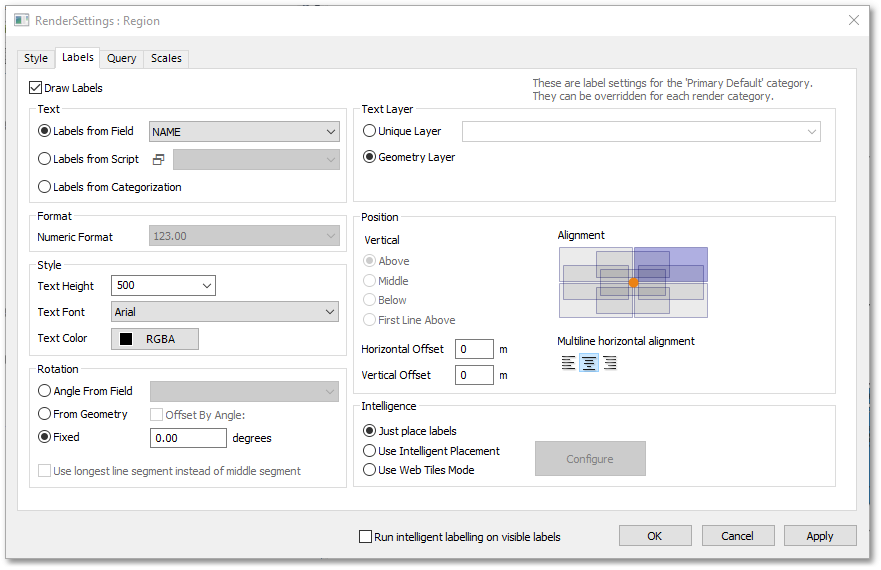
•We want the Region layer to be annotated by the region names. This is done (similarly as above) by right-clicking on the layer but this time selecting Render Settings from menu. Then setting up on the Labels tab:
o Labels from Field: (NAME)
o and Text Height (500 m):
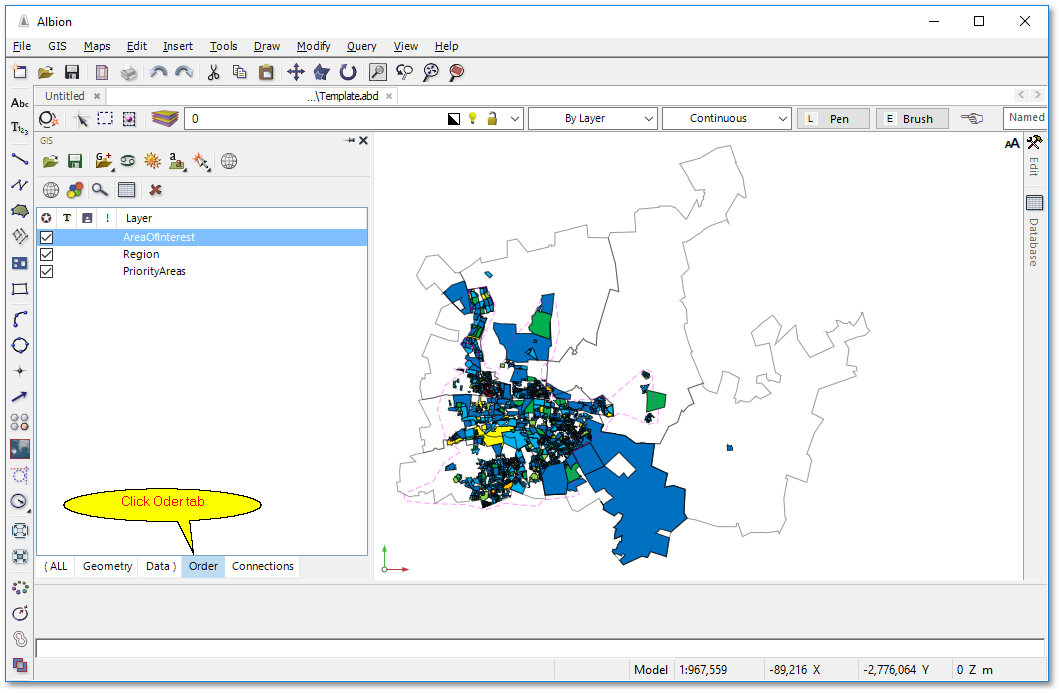
•Make sure AreaOfInterest is the at the top in the GIS Layer Manager, followed by Region. This ensures they appear over the filled PriorityAreas. This can be accomplished by selecting the Order tab on the GIS Layer Manager and then arrange the order by dragging the layers (with the left mouse button):
•At this stage you can save the GIS project to prevent possible loss of work as you go on. Click the ![]() Save icon on the GIS Layer Manager, and enter a file name e.g. ClientProject.agp (the .agp project file format of Albion stores style and render setting):
Save icon on the GIS Layer Manager, and enter a file name e.g. ClientProject.agp (the .agp project file format of Albion stores style and render setting):

After successful project saving, notice "ClientProject" will appear in the top left corner of the GIS Layer Manager.