There is a considerable amount of information associated with water distribution systems, which is not necessarily required to hydraulically analyse the system. Two examples are, for instance, the pipe material and the names of reservoirs/tanks in the system. For system management purposes, it made sense to extend the Wadiso database to include this information, even if it is not required for the analysis of the system. To this end, the additional model data and user-specific data fields (variables) are very useful, and the user is fully enabled to add their own fields.
Open the Pipe/CV data table (via Model Data > Model Tables > Pipe/CV). Navigate in the grid, until you locate a field labelled Material. This is a text field, into which you can enter the pipe materials. The first three pipes (i.e. Pipes 1/3/4) together form the steel feeder main. The rest of the pipes are all of PVC material. In the Material field cells for the first three pipes, type STEEL, and close the table. We will populate the Material field for the other pipes en masse.
We would like to select all the pipes which have not been defined in the table as STEEL pipes, so that we can change them to uPVC pipes (en masse). Right-click on the “STEEL” entry, in the cell of Pipe 4’s Material field. A context menu will appear, from which you must click on the Select Not Equal button. All the pipes in the system, except for the steel feeder main, will be selected. The table(s) and the graphical environment are synchronised, so the selected pipes will also be highlighted in the graphical display. They now represent the system selection set, and they can be edited by entering their material as “uPVC” in one of the following two ways:
•In the table, click on the Selected button to view only the selected pipes, type uPVC in the Material cell of any pipe, and then Copy/Paste it to the cells of the other selected pipes.
•In the table, click on the Selected button to view only the selected pipes, select the entire Material field by clicking on the field header, type in uPVC, and press the Enter/Return key to fill all the selected pipe records;
•In the graphical CAD/GIS interface, open the Database box, and enter uPVC in the Material field, which will update the value for all the selected pipes.
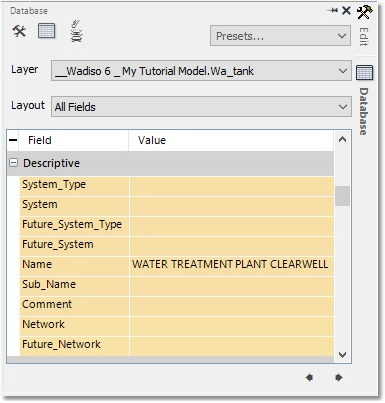
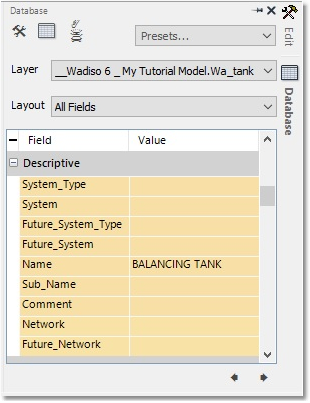
Next, open the Tank data table (via Model Data > Model Tables > Tank). Navigate to the field labelled Name. This is a text field, into which you can enter long names for the tanks. In the Name field cell for Node 1 (the WTP), enter WATER TREATMENT PLANT CLEARWELL. In the Name field cell for Node 8 (the GL_TANK), enter BALANCING TANK, and close the table. That this has, in fact, been updated can be verified by accessing the Database boxes of these two tank nodes, respectively, as shown below: