Close the Graph, and navigate to Analysis > Optimization > Apply Optimization Results. Then, simply select Yes at the prompt to continue. This allows the selection of an alternative to be transferred from the Optimization Results to the System Data. For now, select OPTIMUM and click on OK. A message will confirm the transfer.
The pipe diameters and load pattern corresponding to the optimum or alternative is then updated in the System Data, and the updated model is automatically balanced using the steady state analysis module.
Notice that:
•Pipes in Group 1 and 2 are Closed (by clicking on them, and inspecting the Database properties on the right).
•Pipes 140 (400Ø), 150 (450Ø), and 1000 (400Ø) have optimum diameters.
Set the theme to Analysis:Demand Head, and confirm that there are no average pressures under 20 m in the distribution area, except for the pipe connecting the tower on the east.
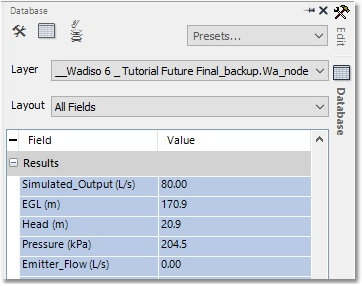
Click on node 1000, and check the results in the Database pane:

The Head = 20.9 m > 20 m.
Also check Node 15: The Head of 21.2 m > 20 m.
Select the Analysis:Flow Velocity theme. It is evident that velocity in all pipes < 2 m/s, i.e. not blue, purple or red, which is desired.
Therefore, the system has been optimized in accordance with the set criteria.
Click on Manage Models > Save Model, confirming that you would want to save all changes.
(Correct file stored as Wadiso 6 - Tutorial Future Optimized_backup.wlz, if the user wants to recover using Manage Models > Close Model / Load Model).
This concludes the section on Optimization. Exit the program.