GIS > ChangeLog > Synchronize (select from Main Menu)
Synchronize data with the Albion Multi-User Editing System.
This function synchronizes multi-user editing enabled data with the Albion Multi-User Editing System and should always be applied before conducting edits on the centrally stored data. The function opens the Synchronize box in which the following steps must be followed to synchronizes your data. Note, via this box, you can also commit and push changes (i.e. post your edits to the centrally stored data), which will also be described below. Some key aspects to keep in mind when going through the synchronization process described below, are the following:
•There is a Combined_Footprint (shapefile) layer that contains the centrally stored polygons.
•A UserBusy polygon is allocated to each user to indicate his current editing area in context of the above-mentioned Combined_Footprint area.
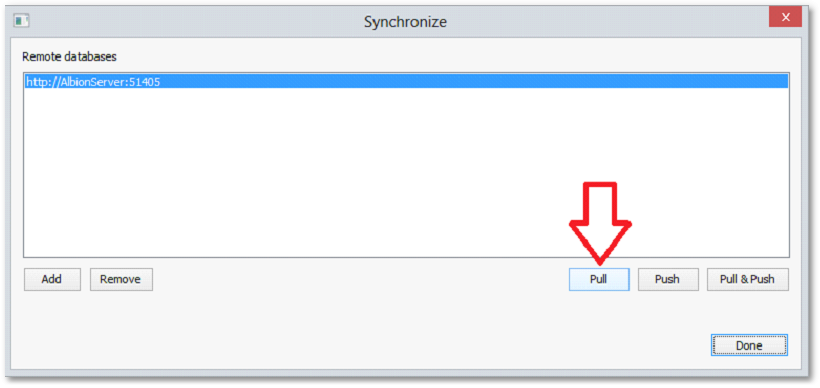
•Click on the Pull button as shown above, to pull in all edits other users have made.
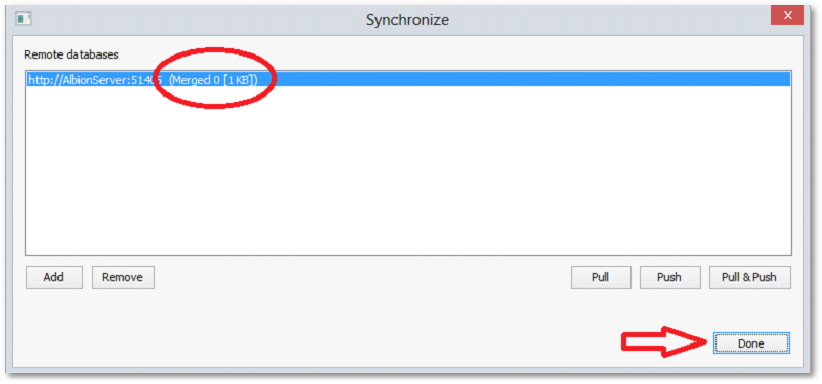
•Wait until the (Merged x [y KB]) text appears on the end of the highlighted row and then press the Done button as shown below:
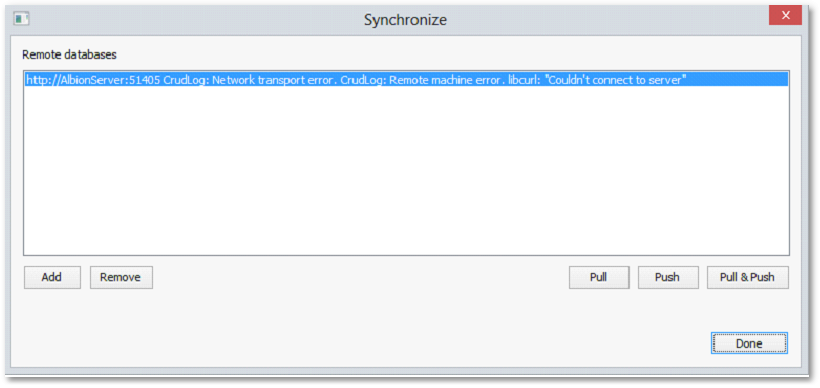
•However, if you get a message like below, it means that either the network/Internet is down or the AlbionService is not running on the AlbionServer. Press Done to get out of this window. You can continue to work and follow the steps below. Changes will only be saved on your computer and will only be sent to the AlbionServer later when a connection can be made to the AlbionService.
•If you did not get an error message, your model is now up to date and includes all changes stored on the server.
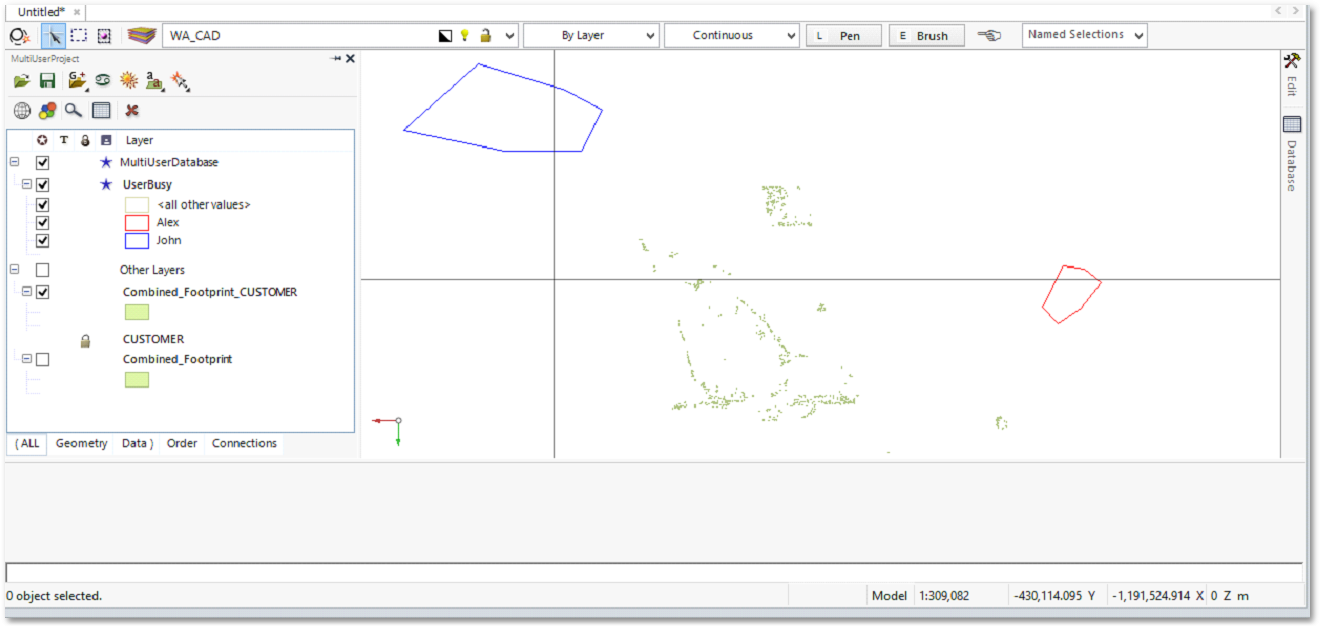
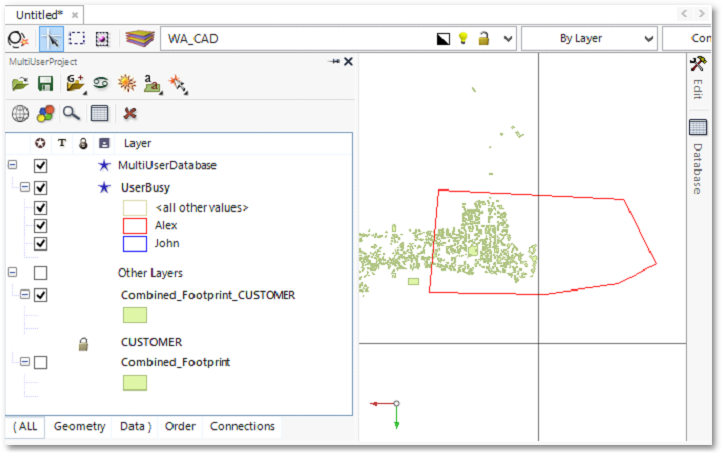
•Notice, in the GIS Layer Manager the GIS layer(s) named UserBusy. These are layers containing polygons showing the area that each user is working on. Find the particular polygon associated with your name, and move/re-shape it, so that it covers the area that you are going to work on next. See example below where user 'Alex' has moved his red polygon into position and reshaped it such that it now encloses the area that he is going to work on next. Ensure your polygon does not cover an area that another user is working on.
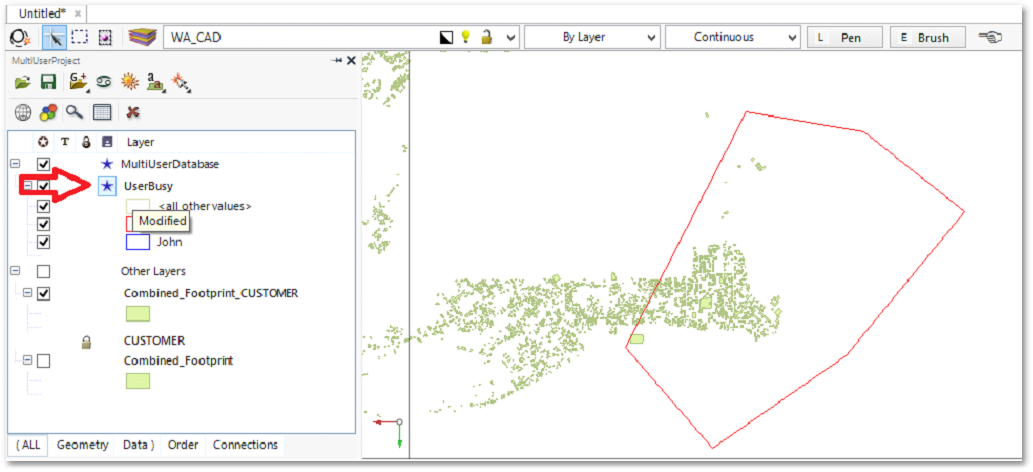
•Now you must save your changes to the UserBusy layer by clicking on the blue star next to the layer, as shown in the next screen-shot:
•Then the next window will appear:
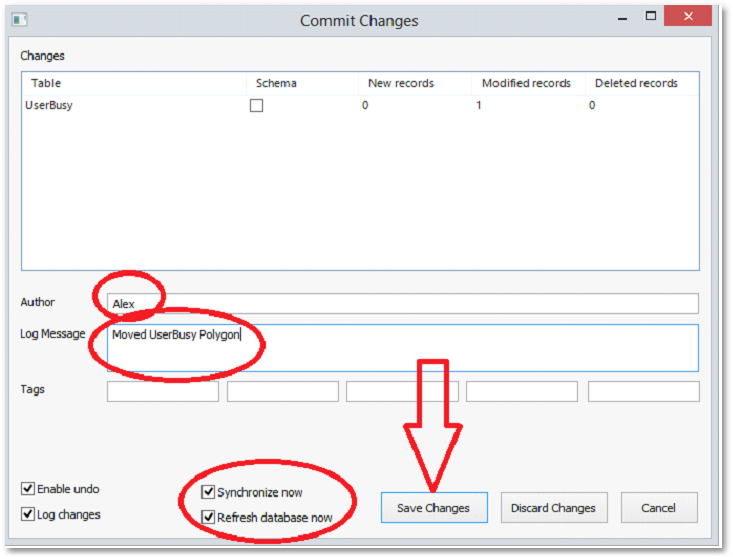
In the above Commit Changes box, ensure that you enter your name under Author and a descriptive message of what you have done in this session under Log Message. Then it is very important that you check that both Synchronize now and Refresh database now have tick marks to their left. The click on the Save Changes button.
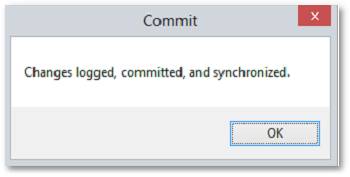
•You will see the same window as in one of the earlier steps regarding data that have been merged. Just wait until it goes away. You will then get a message as shown below - click on the OK button.
•Now you are ready to make your changes to the shared working shapefile (called Combined_Footprint in this example) but only edit within your polygon boundary.
•When finished editing the shared working shapefile (i.e. Combined_Footprint) click on the blue button next to the layer in the GIS Layer Manager.
•A similar Commit Changes box will appear as before. Enter again sensible descriptive text under Log Messages (such as e.g. 'Edited Area-17 footprints'). Check for the two tick boxes (Synchronize now and Refresh database now) both have tick marks to their left. Then click on the Save Changes button.
•Finally you can move your UserBusy polygon out of the way, like to the far right, outside of the footprint area. Click the blue star next to the layer to save it and update the ensuing Commit Changes box in the same way as before to post the edits to the central storage area. Your edits can now be seen by other users as well. They will also notice you are not currently working in area, since your UserBusy polygon is located outside the footprint (as is the case for user Alex's red polygon and the blue polygon of user John, see picture below).