The Albion Layer Control box (accessible via the ![]() toolbar button on the Quick Access Bar) contains various tools to configure the layers in the drawing.
toolbar button on the Quick Access Bar) contains various tools to configure the layers in the drawing.
Layout
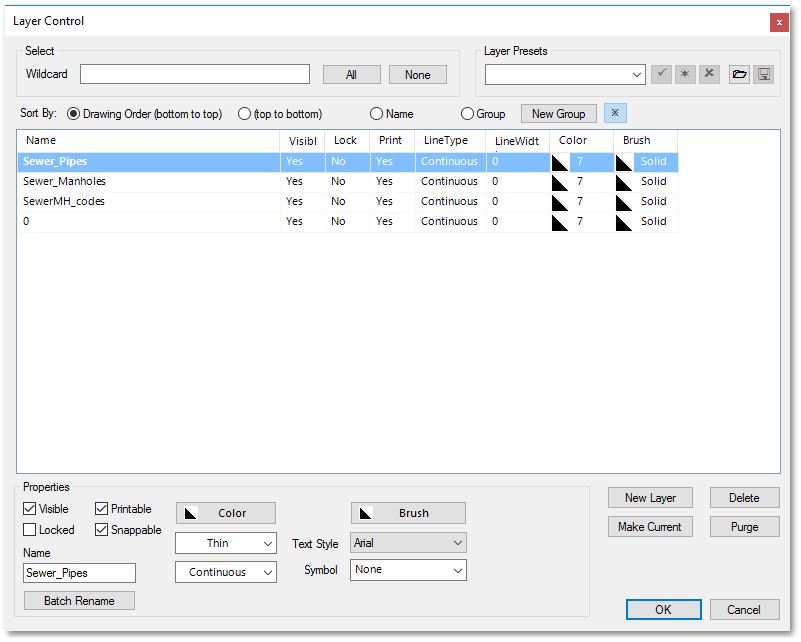
The main features of the Layer Control box are described below:
Select
The select controls allow the user to quickly select a set of layers in a drawing containing a large number of layers. The selected layers are refreshed automatically as the user types the query. The filter supports the wildcards * and ?. An asterisk (*) will match zero or more characters. A question mark (?) will match 1 character.
For example, ca??road* will have the following result on the following set of layers:
ca__road_19 - True
ca00road - True
caroad - False
All will select all layers.
None will clear the selection.
Layer Presets
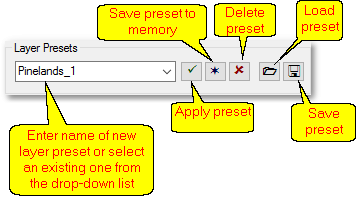
The layer properties (such as visibility status, locked status, printable status, snappable status, line type, line width, colour, brush, text style and block record) can be selected, loaded and saved via the Layer Presets control:
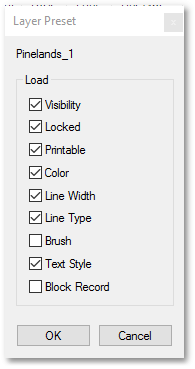
By clicking the above Apply preset button all or only selected layer properties can be update:
The Save preset to memory button saves all layer properties to memory and are acccesible for the current session. Whereas the Save preset button saves the properties to a *.AlbionLayerPreset.xml file, which can later be loaded in again (via the Load preset button).
Sort By
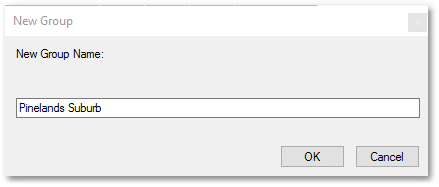
The layer list (see next section) can either be sorted in drawing order (i.e. bottom to top or top to bottom), or alphabetically (according to the layer name or group name). The latter, viz. groups, are similar layers that can be grouped together so that e.g. actions on all layers in the group can be performed on at once (e.g. switch on their visibility or locking them). A group can be specified by clicking the New Group button, which will open the New Group box in which a New Group Name can be specified for the newly created group of layers:
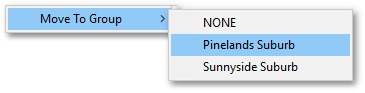
If you choose the first sorting option, viz. to list the layers according to drawing order (either bottom to top or top to bottom), then a selected layer can be moved in the layer list by left-clicking and dragging the layer up or down. Hereby the layer can appear on top or beneath the other layers. Note, if you choose to sort alphabetically (either on layer name or group name), then layers cannot be moved up or down in the drawing order. If the layers are sorted according to group name, selected layers (e.g. Sewer_Pipes, Sewer_Manholes and SewerMH_codes) can be moved to a new group (e.g. Pinelands Suburb) by left-clicking and dragging or alternatively right-clicking and specifying the new group from the ensuing pop-up menu:
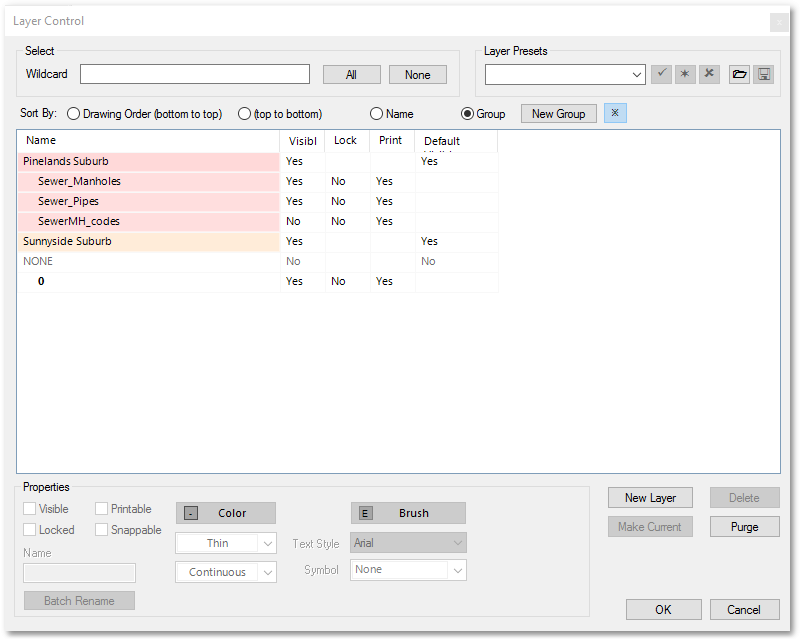
The Layer Control box will be updated accordingly:
The ![]() button (located next to the New Group button) can be clicked to expand or collapse all groups in the layer list.
button (located next to the New Group button) can be clicked to expand or collapse all groups in the layer list.
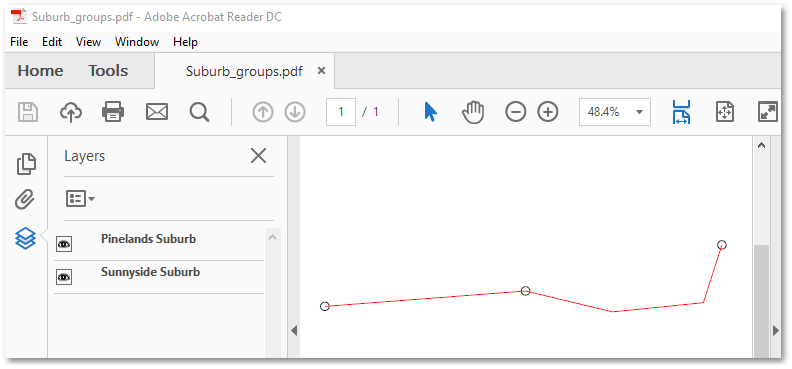
In addition to the above-described layer handling functionality, Groups offer further advantages when it comes to PDF printing. The Groups will namely be included in the PDF files produced by Albion. Acrobat Reader can hereby display the Groups on the Layers pane, where their visibility can be turned on and off by the end user (see below). This is useful when distributing your end product drawing to users who do not have a CAD program.
The layer list
The central large white frame of the Layer Control box lists all the layers in the drawing, as well as their properties. The properties can be changed here, such as layer name, visibility status, locked status, printable status, line type, line width, colour and brush. Note, the layer name can be changed by double-clicking on it.
Alternatively, the above properties can be changed using the Properties control at the bottom of the dialog (see next section).
Properties
The Properties control shows all the properties (such as layer name, visibility status, locked status, printable status, snappable status, line type, line width, colour, brush, text style and block record) of the currently selected layers. Changes made inside the Properties control will immediately be reflected in the layer list. Most of the edits can also be made directly in the layer list as discussed above.
The Batch Rename button can be clicked to open the Layer Batch Rename box, in which a prefix (e.g. Network_) and a suffix (e.g. _001) can be added at once to all selected layer names:
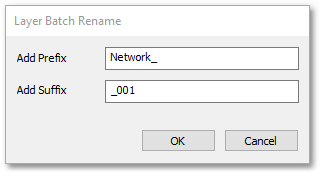
By applying the above batch renaming to selected layers with names "Sewer_Pipes" and Sewer_Manholes" will rename them to the following: "Network_Sewer_Pipes_001" and "Network_Sewer_Manholes_001"
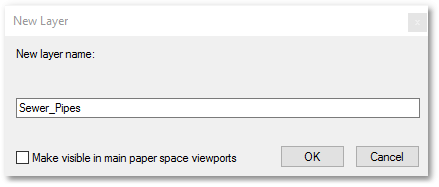
New Layer
Creates a new layer. The name of the new layer can be entered in the ensuing New Layer box:
Make Current Layer
Makes the currently selected layer the current layer. Alternatively, you can set the current layer by selecting it from the layer drop-down list on the Quick Access Bar.
All newly created drawing entities will always be drawn on the current layer (see About Layers). Therefore, always first set the current layer before you start applying the drawing/text tools. Only one layer can be made current at a time.
Delete
Deletes a layer. All entities inside the layer will be irretrievably deleted (i.e. no undo option available).
Purge
Deletes all unused (empty) layers. Note, there is no undo option available.