The Model Data > Model Topology > Add Pipe function allows graphically the addition of a pipe link to the existing system model.
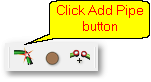
Alternatively, click on the Add Pipe toolbar button to access the above function:
This launches the Quick Draw function with which pipes can be added to existing nodes or created from scratch.
There are three different drawing modes, viz. Single, Connected and Multi-Segment modes:
![]()
•The Single mode (leftmost option) in which each left-click with the mouse represents the placement of a node, and after two such left-clicks a straight pipe between the two nodes is created.
•Multi-Segment mode (rightmost option), in which the first left-click either selects or creates the first node, and subsequent left-clicks create only vertices on the pipe, until the last left-click which will be the second node of the pipe if followed by a right-click.
•Connected mode (middle option). Here every left-click represents a node whereby multiple, connected straight pipes can be captured until the process is stopped by a right-click.
The Populate from Presets input form is also launched when adding pipes to the model. This form provides the user with an opportunity to override the default values as set up in the System tab of the Model Settings. A pressure pipe catalogue database is provided for use and is used to select a pipe with specific material, diameter and pressure rating classification information.
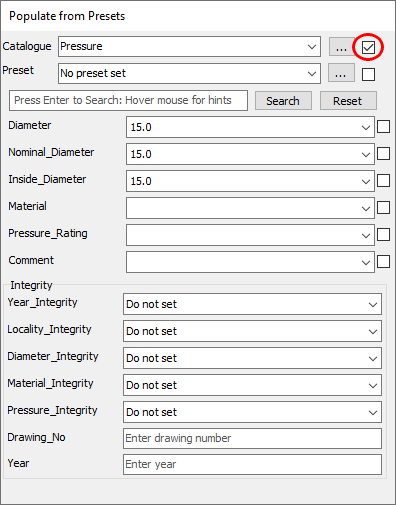
The database is viewed by clicking on the ellipses button on the right of the 'Catalogue' database selection drop-down, and a record with the desired information can be selected.
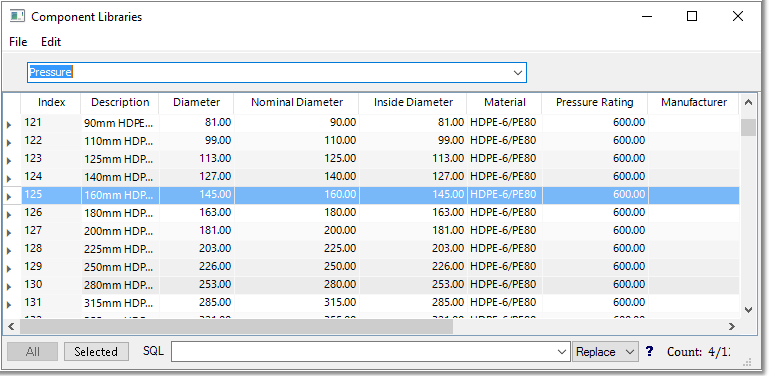
After selecting an applicable record and closing the Component Libraries window, the populate form will be updated with the information from the selected record. Note that the data is filled in the search query input box and to perform the search either click on the "Search" button or press the Enter/Return key. The information available from the drop-downs for Diameter to Pressure Rating is a filtered list from the catalogue database, only showing the available options for that field based on the search query input. Also note, that the Component Library will also launch in a filtered state. To have all options available simply clear the query text by clicking the Reset button. The checkboxes to the right of the catalogue fields allow the user to "lock" the value for that field, and when the Reset button is clicked, the value will remain in the search query, which will then re-apply a filter from the library. Also note that when the catalogue field drop-downs are displayed in green, it means that there are no other values available for that field from the component library in the current filtered state.
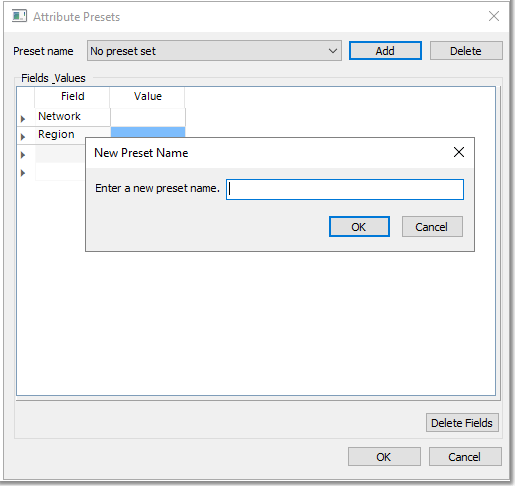
Additional data input for other pipe table fields (apart from the fields explicitly shown on the form) is also available by means of the presets database functionality. Several tables, consisting of Field:Value pairings (presets) can be established to capture additional data such as location information. Click on the ellipses button to the right of the 'Preset' table selection drop-down to open the Attribute Presets form, and add, edit or delete presets before continuing with the capturing procedure.
Both the Catalogue and Preset functionality can be disabled by unchecking the checkboxes to the right. If this is the case, then the only information that will be populated is the default values.