This section describes how the Paper Space works in Albion.
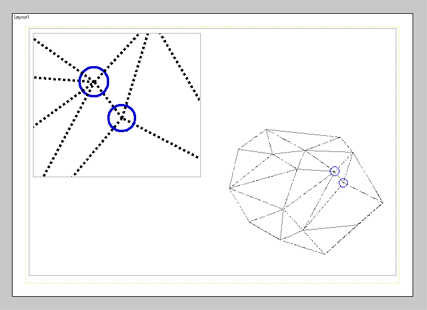
A sample Paper Space layout showing two views on the model.
Overview
Paper Space is a concept that has been borrowed from most of the existing CAD and GIS systems. It allows one to create multiple paper layouts, with any number of views onto the main drawing. Each paper layout represents a single printable sheet of paper, set in a fixed size, such as A3 Landscape or A4 Portrat. From inside paper space one can create normal CAD objects, which remain only on that particular page. This avoids cluttering one's main drawing with information that needs only to be seen on paper. Albion provides for an unlimited number of Paper Space layouts in a drawing.
Toggling between Model and Paper space.
On the status bar, located at the bottom of the CAD window, is an indicator stating which 'space' the drawing is currently operating in.
![]()
The drawing is in Model Space.
Clicking on the label 'Model' or 'Paper' will switch between the two spaces. Right-clicking on 'Model' or 'Paper', as the case may be, will allow you to choose which Paper Space to switch to, or create a new paper layout.
Creating a New Paper Space Layout
Right-click on the 'Model' label in the centre of the status bar (which lies beneath the drawing).
Choose Insert New from the menu that pops up.
Inserting More Viewports
Make sure you're in paper space (you will see a white page with a grey background).
From the Albion CAD main menu, choose Insert > Paper Space Objects > Viewport
Adjusting a Viewport
Select the Viewport that you want to adjust, by clicking on it.
Right-click, and choose Edit Drawing, or alternatively, double-click on the viewport.
You will see the paper sheet turn gray, and the Model Space drawing inside the viewport will come to life. You can now pan and zoom around within the Viewport. When you are satisfied with your view, click the red Done button on the bottom right corner of the drawing. If you want to leave the Viewport unchanged, press Esc on the keyboard.
You will also notice that the layer list has changed now to the full set of layers inside Model Space.
Turning Model Space Layers On/Off
Activate the Viewport drawing, as described in the previous section 'Adjusting a Viewport'.
From the layer drop-down list (on the Quick Access Bar), or from the Layer Control box, turn your model space layers on and off. Every single Viewport keeps its own records of which layers to show and which to hide.
Click the red Done button if you are satisfied with your changes.
Adding/Deleting Pages
Right-click on the 'Model' or 'Paper' label on the status bar, and choose <Manage Table>. The Layout box will open with layout handling functions to add, delete and switch to layouts.
Confusion
First-time users are often confused by Paper Space because of the overlap in names and concepts between Paper and Model Space. The following points will help clear up some mistaken conceptions:
•Every sheet of paper has its own set of layers. These layers hold things such as borders around Viewport, text pertaining to this particular plot, page numbers, etc.
•Every sheet of paper should be thought of as an independent drawing with Viewport objects on it. Although they are independent drawings, they are all naturally bound to their Model Space drawing.
•Viewports on paper space are normal CAD objects that can be created, copied, moved, scaled, and deleted. They have editable properties (such as Scale) just like any other CAD object.
•Every single Viewport keeps its own records of which Model Space layers to show and which to hide. Thus turning a layer off in Model Space will not turn it off in your Viewports. If you want to change layer visibility en masse, use the menu command Tools > Show/Hide Layers In All Layouts
See Also